Monday, March 18, 2024

Mixed Media Pear Card

Hello crafters! It is a new week! The sun is shining and I hope you had a good weekend. 

Please note: this post has affiliate links, for which I receive a small percentage of sales generated by the link, at no extra cost to you.


This week we have a Food or Drink theme at the Simon Says Stamp Monday Challenge Blog. I hope you will join us! And don't miss the lovely card by our March guest designer Ann Chuang.


Layers of ink - Mixed Media Pear Card tutorial by Anna-Karin Evaldsson.

I love fruit and made a mixed media pear card this week. It started out as a tag, but I wanted more than one pear and decided to make a tall card instead. The card is about 9 x 3.5 in. The pears were colored with pencils and the background is inked with both Distress Ink and Distress Oxide Ink. 

Layers of ink - Mixed Media Pear Card tutorial by Anna-Karin Evaldsson. Stamp with Stamper's Anonymous Classics 1

Start by stamping the pear from Stamper's Anonymous Classics #1 three times on heavystock cardstock. 

Layers of ink - Mixed Media Pear Card tutorial by Anna-Karin Evaldsson. Color with Prismacolors.

Color the pears with colored pencils. I used Prismacolor pencils. Use a light colored pencil (yellow, pink/white) to blend the colors.

Layers of ink - Mixed Media Pear Card tutorial by Anna-Karin Evaldsson. Ink with Distress Ink.

Stamp the pears on Simon Says Stamp Masking Paper, cut out and place on the pears. Ink with various Distress Inks.

Layers of ink - Mixed Media Pear Card tutorial by Anna-Karin Evaldsson.

Remove the masks and stamp the background here and there with Simon Says Stamp Crackle Background. 

Layers of ink - Mixed Media Pear Card tutorial by Anna-Karin Evaldsson.

Smear Mermaid Lagoon Distress Oxide Ink on a non-stick craft sheet and mist with water. Lightly press the paper into the ink. The pears will resist the ink and you can just wipe it off, but if you leave it to dry, there will be nice blue specks here and there on the pears too. Let dry and repeat with Scorched Timber Distress Ink. 

Layers of ink - Mixed Media Pear Card tutorial by Anna-Karin Evaldsson.

I added some highlights and details with a white gel pen and a white paint pen, as well as with a black pen.

Layers of ink - Mixed Media Pear Card tutorial by Anna-Karin Evaldsson.

Distress the edges of the papers and stitch with a sewing machine. 

Layers of ink - Mixed Media Pear Card tutorial by Anna-Karin Evaldsson. Add Distress Oxide ink.

Don't worry about getting the coloring perfect, since we are aiming for a messy look.

Layers of ink - Mixed Media Pear Card tutorial by Anna-Karin Evaldsson.

Add shadow and shading to the pears with both pencils and the black pen.

Layers of ink - Mixed Media Pear Card tutorial by Anna-Karin Evaldsson.

The Distress Oxide Ink splotches almost shines on the background.

Layers of ink - Mixed Media Pear Card tutorial by Anna-Karin Evaldsson.

More examples of the inky goodness. Fill in some of the text with a black pen if it is difficult to read.

Layers of ink - Mixed Media Pear Card tutorial by Anna-Karin Evaldsson.


I hope you will join us this week in our Food and Drink challenge. You have a chance to win a $25 gift voucher to do some fun shopping at Simon Says Stamp. You have until Monday 8am Ohio time. 1pm UK time, 2 pm CET to join in.


Do you use Instagram? If so please add #sssmchallenge so we can see your entries there too.


Thank you so much for stopping by here today! 

Happy crafting!

Anna-Karin

Supplies:

* Please note: the links are affiliate links, for which I receive a small percentage of sales generated by the link, at no extra cost to you.


Saturday, March 16, 2024

Pastel Easter Decor

Hello crafters! Easter comes early this year and today I am sharing an Easter decor tutorial, with pastel colors and glitter. You can also use the techniques for other themes, it doesn't have to be for Easter.

Please note: this post has affiliate links, for which I receive a small percentage of sales generated by the link, at no extra cost to you. 
Layers of ink - Pastel Easter Decor with Bunnies tutorial by Anna-Karin Evaldsson.

I wanted to make a project with the happy bunnies from Tim Holtz Vault Hippity Hop dies and decided to use an Etcetera panel as my base. The project is about 5.3 x 7 in. The mixed media background can be used for many different projects and you can of course change the colors to get a completely different look. I used both texture and crackle paste for the background, combined with Distress Paint, stamping and Stickles glitter gel.

Layers of ink - Pastel Easter Decor with Bunnies tutorial by Anna-Karin Evaldsson. Coat with gesso.

Paint the Etcetera panel with gesso. I added two coats. Let the gesso dry in between applications.

Layers of ink - Pastel Easter Decor with Bunnies tutorial by Anna-Karin Evaldsson. Stamp with Tim Holtz School Desk.

Stamp the background here and there with the alphabet stamp from Tim Holtz School Desk set.

Layers of ink - Pastel Easter Decor with Bunnies tutorial by Anna-Karin Evaldsson. Apply texture paste through Simon Says Stamp stencil.


Layers of ink - Pastel Easter Decor with Bunnies tutorial by Anna-Karin Evaldsson. Add Ranger texture paste.

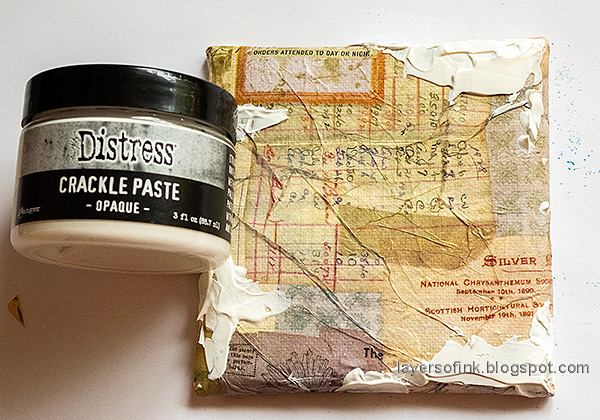
Add Crackle Paste at the base.

Layers of ink - Pastel Easter Decor with Bunnies tutorial by Anna-Karin Evaldsson. Add Ranger crackle paste.

Cracks appear as the paste dries. The thicker the paste, the larger the cracks.

Layers of ink - Pastel Easter Decor with Bunnies tutorial by Anna-Karin Evaldsson. Paint with Distress Paint.

Paint with Distress Paint and add water to blend.

Layers of ink - Pastel Easter Decor with Bunnies tutorial by Anna-Karin Evaldsson.

Die cut the Tim Holtz Hippity Hop bunnies from collage paper. I made this paper for a different project and had left-overs. Glue pieces of old book paper to watercolor paper, coat with gesso in an uneven manner. Let dry. It's a great paper to use for many different types of projects.

Layers of ink - Pastel Easter Decor with Bunnies tutorial by Anna-Karin Evaldsson. Paint with distress paint.

Paint the bunnies with Distress Paint and mist with water. 

Layers of ink - Pastel Easter Decor with Bunnies tutorial by Anna-Karin Evaldsson. Paint the bunnies and butterflies.

I also decided to die cut three butterflies (also from the Hippity Hop set) from the collage paper and paint them.

Layers of ink - Pastel Easter Decor with Bunnies tutorial by Anna-Karin Evaldsson.

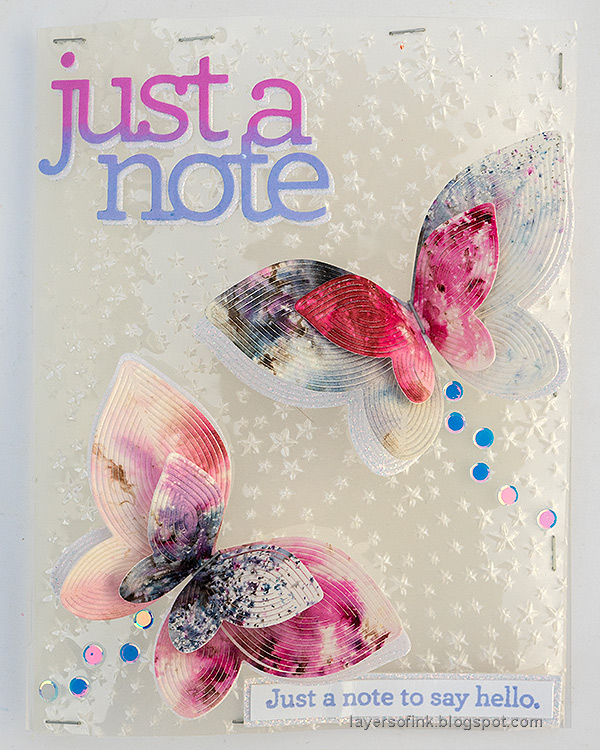
I die cut the butterflies from glitter paper and from vellum too, shaped the wings and layered them. 

Layers of ink - Pastel Easter Decor with Bunnies tutorial by Anna-Karin Evaldsson. Add Ranger stickles glitter gel.

Apply Ranger Moon Dust Stickles Glitter Gel to the background - of course before gluing everything in place (I forgot to take a photo). Let dry.

Layers of ink - Pastel Easter Decor with Bunnies tutorial by Anna-Karin Evaldsson.

Use sequins to create a trail behind the butterflies. Add a Tim Holtz Bouquet Flower to one of the bunnies.

Layers of ink - Pastel Easter Decor with Bunnies tutorial by Anna-Karin Evaldsson. Add a shadow to the bunnies.

To make the bunnies stand out from the background, I die cut them again from Simon Says Stamp Slate cardstock and offset it slightly to create a shadow. 

Layers of ink - Pastel Easter Decor with Bunnies tutorial by Anna-Karin Evaldsson. Die cut foliage from glitter and vellum paper.

Die cut foliage with Simon Says Stamp Budding Branches, from Simon Says Stamp white glitter cardstock and vellum

Layers of ink - Pastel Easter Decor with Bunnies tutorial by Anna-Karin Evaldsson.

The old book paper, gesso and paint adds an interesting, but still subtle, texture to the bunnies.

Layers of ink - Pastel Easter Decor with Bunnies tutorial by Anna-Karin Evaldsson.

You can mix Distress Paint to get the shade you are looking for.

Layers of ink - Pastel Easter Decor with Bunnies tutorial by Anna-Karin Evaldsson. Add sequins.

I added sequins to the buds on the glitter die cuts.

Layers of ink - Pastel Easter Decor with Bunnies tutorial by Anna-Karin Evaldsson. Coat the letters with Glossy Accents.

The title was die cut with the alphabet dies from the Hippity Hop set. It was die cut from Simon Says Stamp yellow glitter paper and Slate cardstock. Glue together. Add a layer of Glossy Accents to the letters for a finished look.

Layers of ink - Pastel Easter Decor with Bunnies tutorial by Anna-Karin Evaldsson.

Some of the Bouquet Flowers were colored with yellow shades of Distress Ink. The heart beads have been in my stash for a very long time.

Layers of ink - Pastel Easter Decor with Bunnies tutorial by Anna-Karin Evaldsson.

I added a piece of lace trim at the bottom of the panel. The stamped sentiment at the top comes from Tim's Crazy Talk and was stamped on a Journal Card.


See you soon again! 


Anna-Karin

Supplies:

* Please note: the links are affiliate links, for which I receive a small percentage of sales generated by the link, at no extra cost to you.


Monday, March 11, 2024

Yellow spring flowers tag

Hello stampers! I hope you are well and had a good weekend. I enjoyed walks in the city and some crafty time.

Please note: this post has affiliate links, for which I receive a small percentage of sales generated by the link, at no extra cost to you.


This week we have an A Bit O’ Green theme at the Simon Says Stamp Monday Challenge Blog. Don't miss the project by our March guest designer Ann Chuang.


Layers of ink - Yellow spring flowers tag tutorial by Anna-Karin Evaldsson.

Almost at the same time as the snowdrops, winter aconites appear in the garden. The small yellow flowers look cheerful and almost out of place in the still cold March weather. On this tag, I wanted to capture the flowers appearing here and there in the grass. The grass is not nearly this green yet, but I wanted green grass instead of the fairly pale grass we have now. 

Layers of ink - Yellow spring flowers tag tutorial by Anna-Karin Evaldsson. White emboss Tim Holtz Tiny Prints.

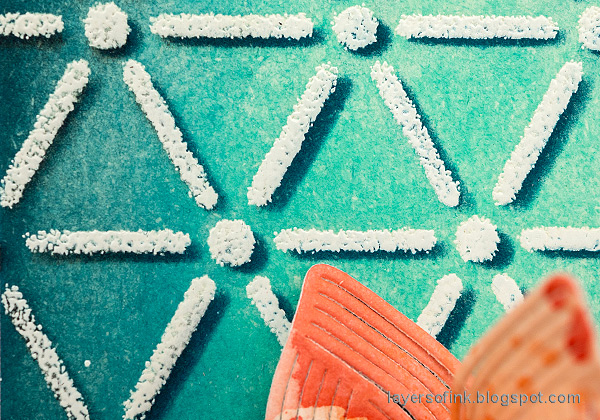
The background is covered in tiny flowers and leaves, white embossed with Tim Holtz Tiny Prints background. I used Simon Says Stamp embossing ink and white embossing powder.

Layers of ink - Yellow spring flowers tag tutorial by Anna-Karin Evaldsson. Ink with Distress Ink.

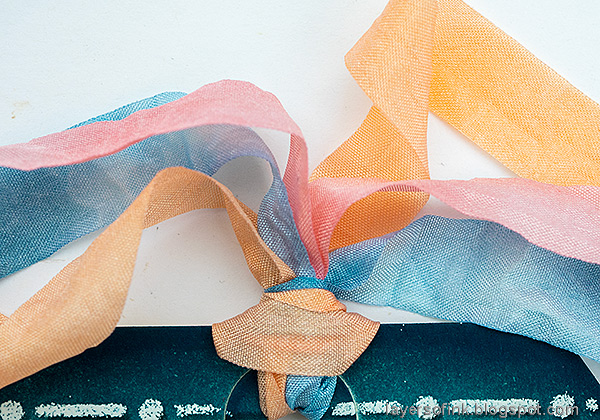
Ink with plenty of green Distress Ink. The embossing will resist the ink. I used Scorched Timber around the edges. While I had the inks out, I also dyed some Faux Wrinkled Silk Ribbon for the tag.

Layers of ink - Yellow spring flowers tag tutorial by Anna-Karin Evaldsson. Stamp the flowers on watercolor paper.

Some of the flowers from Simon Says Stamp Blooming Meadow had similar shapes as winter aconites, in particular the smaller flowers used here. Stamp with black ink. I used watercolor paper. I wanted the stems a little longer and extended them with a black pen.

Layers of ink - Yellow spring flowers tag tutorial by Anna-Karin Evaldsson. Color with Prismacolor pencils.

Color the flowers with colored pencils. I used Prismacolors. 

Layers of ink - Yellow spring flowers tag tutorial by Anna-Karin Evaldsson. Add white highlights.

Add highlights and details with a white gel pen and a white paint pen.

Layers of ink - Yellow spring flowers tag tutorial by Anna-Karin Evaldsson.

Cut the flowers out and glue to the background. I forgot to take a photo of the step with the leaves. Use left-over inky green papers or make green papers by smearing various green Distress Inks on a non-stick craft sheet, mist with water and press watercolor paper into the ink. Let dry and repeat. Die cut flowers with Simon Says Stamp Budding Branches and cut into leaves. The leaves aren't exactly the right shapes, but they would have to do.

Layers of ink - Yellow spring flowers tag tutorial by Anna-Karin Evaldsson. Stamp sentiments with Simon Says Stamp Forest Scenery.

The sentiments were stamped on the same green inky paper that I used for the leaves, with Simon Says Stamp Forest Scenery stamp set. Cut into strips.

Layers of ink - Yellow spring flowers tag tutorial by Anna-Karin Evaldsson.

The most amazing thing with spring is all the shades of green which start to appear. We are not there yet, but the winter aconite show that it is on the way.

Layers of ink - Yellow spring flowers tag tutorial by Anna-Karin Evaldsson. Add sequins.

I also added a few sequins, for some bling.

Layers of ink - Yellow spring flowers tag tutorial by Anna-Karin Evaldsson.

I tied my dyed ribbons and a piece of organza ribbon to the tag.

I hope you will join us this week in our A Bit O’ Green challenge. You have a chance to win a $25 gift voucher to do some fun shopping at Simon Says Stamp. You have until Monday 8am Ohio time. 1pm UK time, 2 pm CET to join in.


Do you use Instagram? If so please add #sssmchallenge so we can see your entries there too.


Thank you so much for stopping by here today! 

Happy crafting!

Anna-Karin

Supplies:

* Please note: the links are affiliate links, for which I receive a small percentage of sales generated by the link, at no extra cost to you.