Tuesday, December 31, 2013

2013 Favourite Posts Part 1

The last day of the year, and I thought I'd post some favourites. I am not good at picking favourites of any kind - stamps, dies, books, movies etc. Nevertheless, I've tried to pick two or three projects a month that I am particularly happy with, for different reasons. If I had done these picks another day, I might very well have picked different projects. I divided this post into two, starting with January - June.

January

http://layersofink.blogspot.com/2013/01/tutorial-four-seasons-accordion-booklet.html
Four Seasons Accordion Booklet tutorial - I love to build little scenes and add small, but meaningful, details to my projects, and this accordion book has both these aspects, combined with my love for nature.

Quiet layout - this is one of my favourite layouts this year, a mixed-media layout made for Simon Says Stamp Monday Challenge. I like the misted, stamped and stencilled  background, the photo and the quotes. Another favourite layout during January was this Follow Your Dream layout.

February

http://layersofink.blogspot.com/2013/02/dry-embossed-wax-resist-tutorial.html
Dry Embossed Wax Resist Tutorial - this was one of my favourite tutorials during 2013 and I was real happy to have thought of this version of the more traditional crayon resist technique.

http://layersofink.blogspot.com/2013/02/love-atc-box-tutorial.html
Love ATC Box Tutorial - I had so much fun making this ATC box with Eileen Hull's Sizzix ATC Box die, and filling it with stamped ATCs and quotes about love.

http://layersofink.blogspot.com/2013/02/off-to-neverland.html
Off to Neverland - Another favourite layout, placing my son in a fairy tale scene built with dies, stamps, and inks.

March

http://layersofink.blogspot.com/2013/03/vintage-pop-up-mini-book.html
Vintage Pop-Up Mini-Book Tutorial - Pop-ups are great for mini-books, adding a fun interactive elements, and in this book with my mom's childhood photos I used a lot of them.

http://layersofink.blogspot.com/2013/03/unfound-door-canvas.html
Unfound Door Canvas - This canvas made for Simon Says Stamp Monday Challenge has layers of paint, transfers, stamping and stencilling, creating a lot of texture.

April


http://layersofink.blogspot.com/2013/04/heart-shadow-boxes-tutorial.html
Heart Shadow Boxes Tutorial - I love shadow boxes and I was so happy to find a similar photo of my grandmother, mother and myself to use for this project.

http://layersofink.blogspot.com/2013/04/colour-love.html
Colour Love - This was a real fun post to do, a colouring tutorial, showing how to colour a Darkroom Door photo stamp with six different mediums.

May

http://layersofink.blogspot.com/2013/05/reading-chair-pop-up-tutorial.html
Reading Chair Pop-Up Card Tutorial - One of my favourite cards of the year, and I also used some really fun techniques in this tutorial. I like to use photos in my projects and this is also another example of a little scene.

http://sizzixblog.blogspot.com/2013/05/susans-garden-birdhouse-and-flowers.html
Susan's Garden Birdhouse - One of my favourite 3-D items of the year, my first project with the Sizzix Susan's Garden dies by Susan Tierney-Cockburn.

http://simonsaysstampandshow.blogspot.com/2013/05/into-woods-with-anna-karin.html
Through a Forest Wilderness Canvas - I like the texture of this mixed-media canvas, made for a tutorial for Simon Says Stamp Monday Challenge (then Simon Says Stamp & Show). Looking at it makes me feel as if I am stepping into a forest.

June

http://www.sizzixblog.blogspot.com/2013/06/garden-memories-pop-up-album.html
Garden Memories Pop-Up Album - Another pop-up album tutorial, made with dies by Eileen Hull and Karen Burniston. I loved how this album turned out and it documents memories of my childhood garden which no longer exists, making it extra special.

http://layersofink.blogspot.com/2013/06/s-is-for-simon-says-stamp-show.html
You Layout - This happy and colourful layout was made using mainly dies and stamps by Tim Holtz. I like the background, the houses and of course the great sentiments.

I hope you enjoyed these! I'll post the second part in a few days time.

Happy New Inky Year!

Anna-Karin

Monday, December 30, 2013

12 tags of 2013 December - Luminary

Hello everyone! In the last minute, my version of Tim Holtz 12 tags of 2013 December. I started making this on Christmas Eve, but didn't get a chance to finish until after Christmas. I normally make tags for the 12 tags, but I wanted to make a winter luminary and thought this was as good opportunity.
 
Both Tim's Frosted Film and Wendy Vecchi's Modeling Film are favourite products of mine, and I actually combined them in much the same way as Tim did on his December tag on a project I made last year for Simon Says Stamp. I loved the result and thought it would work perfectly for a snowy project.
 
I also used Frosted Film for the windows of the luminary. Earlier this year, I made an autumn luminary inspired by a tutorial by Tammy Tutterow where she made a transfer on frosted film. I really like the frosted transfer luminary windows and repeated it here again. For the transfer, I used papers from Tim Holtz Mini Seasonal stash, two snowy patterns and two music patterns. When the transfers were done, I backed them with acetate to make the windows stronger.
 
Tim's Luminary die is so much fun. I die cut it from manila cardstock, you can also use thin chipboard, but thick materials won't work since it has quite a few folds. You need to die cut four sides and two roof pieces. The paper was inked with Antique Linen and Weathered Wood Distress Stain. When it was dry, I used a dot stencil to sponge Frayed Burlap and Weathered Wood Distress Ink. I also stamped it with one of my favourite script stamps, using Archival Jet Black ink, and holding the cling stamp in my hand instead of mounting it on an acrylic block.
 
Frosted Film was adhered to clear Modeling Film and I die cut snowflakes and small pine trees from it. The blue snowflakes and trees were inked with Blue Cornflower and French Ultramarine Archival Ink. I felt that I also needed some white, and the white pieces were painted at the back with Picket Fence Distress Paint, not aiming for perfect coverage.
 
I love Modeling Film and use it a lot, it is so versatile and keeps its shape perfectly once cool. Here are some examples of other projects using modeling film: Joy to the World, Jumbo Tattered Florals Shadow BoxButterfly Post, Globe Card, Circle Frame, Metal-ology Tag, Flying Butterflies tutorial, and Fly to Paris Pop-Up.
 
Because the film keeps its shape, some of the trees were placed on the 'shelves' in front of the windows, creating more dimension.

I attached the modeling film pieces with brads or mini staples before assembling the luminary. The luminary was also splattered with paint before assembly. Loved the snowy effect. I had to add a tiny bit of water to the Picket Fence Distress Paint before it would splatter well. All the edges were inked with Gathered Twigs.

When the luminary was assembled, I squeezed out some Glossy Accents here and there and sprinkled it with mica flakes, to add one more snowy effect.

The snowflakes were layered two together.

I also added some mica flakes on the roof.

The dimensional effect of the Frosted Film/Modeling Film pieces is great and since they are translucent, it looks fabulous also when the luminary is lit with a battery-driven tea candle. You can of course not use real candles in a luminary made of paper.

Here you can get an idea of how the luminary looks in the dark with a battery-driven tea candle. Very cozy!

Thank you so much for looking!
 
Happy Crafty Year 2014!
 
Anna-Karin
 
Supplies:
Surfaces: Ranger Manila Cardstock; Tim Holtz Idea-ology: Frosted Film, Seasonal Collage Mini; Wendy Vecchi Stampers Anonymous Clearly For Art Modeling Film
Stamps: Stampers Anonymous Tim Holtz: Classics #9
Ink: Distress Ink: Frayed Burlap, Gathered Twigs, Weathered Wood; Archival Ink: Cornflower Blue, French Ultramarine, Jet Black
Stain: Distress Stain: Antique Linen, Weathered Wood
Paint: Distress Paint: Picket Fence
Stencil: Tim Holtz Stampers Anonymous: Dot Fade
Embellishments: Stampendous: Pearlized Mica Flakes

Friday, December 27, 2013

Winter Joy Layout

Hello everyone! I hope you had a lovely Christmas. Today I am sharing a layout with some winter inspiration, using a bunch of Tim Holtz Sizzix dies and embossing folders.
 
Layers of ink - Winter Joy
I love the new Window & Window Box die and thought it would be fun to use it together with a photo, as if you are looking out from a cottage on a beautiful rural winter landscape. This photo was taken in Norway during a walk.   
 
The window and window box were die cut from mat board and painted with Picket Fence Distress Crackle paint. When dry, I sponged just a tiny bit of Antique Linen Distress Ink into the cracks. The holly leaves were stamped with Antique Linen and French Ultramarine Archival. It is a stamp and die combo set containing seven stamps and dies. The magnetic platform is perfect for stamp/die combos, since it is very easy to line up and the die won't shift. I adhered the window and the window box with foam dots and layered them on a dictionary paper and cheese cloth.
 
To create the look of looking out from a wooden cottage, I used the Wood Planks embossing folder and Ranger Specialty Paper. After embossing, the paper was lightly inked with Antique Linen. The bark hearts were white washed with Picket Fence Distress Stain.
 
'Winter' was die cut with the Christmas Thinlits set, as well as the ornate circle under 'Joy'. 'Joy' was stamped with French Ultramarine and die cut with the coordinating die. It is a meant as a Christmas stamp, but I think this word works all year around. I also added some mica flakes here and there, for shimmer.
 
Snowflakes were also die cut from mat board and painted with the white crackle paint, as well as stamped with French Ultramarine and die cut with the coordinating dies.  
 
One of Tim Holtz Facets was on my desk and I thought I'd make a little ornament for the wall of the cottage. This cute squirrel is on one of the Thanksgiving papers in Tim's Mini Seasonal Collage paper stash. It was glued to the crystal with Glossy Accents and when dry, placed in a bowl of water for a few minutes. Then I rubbed off the paper at the back. You can see that I was a bit impatient and the Glossy Accents hadn't dried completely, so I rubbed off a little bit of the squirrel too.

For my journaling, I used a quote, and also wrote more text on the back of the layout.

Even though this deer might not belong inside a cottage, I really wanted to use it. It was stamped with Antique Linen on Specialty Stamping paper and die cut with the coordinating die.

Thank you for the visit!

Anna-Karin

Supplies:
Surfaces: Sizzix Little Sizzles Mat Board 6 x 13; Ranger Specialty Stamping paper; Tim Holtz Idea-ology: Seasonal Collage Mini paper stash; old dictionary paper; cheese cloth
Dies: Sizzix: Window & Window Box, Mini Snowflakes, Holly, Beaded & Snowflake Garland, Christmas Thinlits set,
Embossing folder: Sizzix: Ink Splats & Wood Planks
Stamps: Stampers Anonymous Tim Holtz/Sizzix stamp and die combo: Holiday Joy
Ink: Distress Ink: Antique Linen; Archival Ink: French Ultramarine
Paint: Distress Crackle Paint: Picket Fence
Stain: Distress Stain: Picket Fence
Embellishments: Tim Holtz Idea-ology: Facets, Linen Ribbon, Mirror Stars; Stampendous: Pearlized Mica Flakes; Prima Hearts Natural Bark Icons; lace trim; pom pom ribbon
Tools: Sizzix: Big Shot, Magnetic Platform

Wednesday, December 25, 2013

Blueprint Bauble Christmas

Merry Christmas to everyone!! I had forgotten to post one of my Christmas cards, so instead of waiting a whole year, I thought I would post it today.
 
I remembered about this card the other day when I posted eight cards made with Tim Holtz Blueprint stamps. I used this bauble stamp there too, but this card uses a different technique. You can use the blueprint stamps for paper piecing with great results. Here, I stamped it first on Ranger's Specialty Stamping Paper, and then again on text paper and on the back of the same paper used in the background. The Specialty Stamping paper was inked with Gathered Twigs and flicked with water droplets. I cut out and pieced together the bauble pieces from the other papers on top. The 'ornament' word was also cut from one of the patterned papers and placed inside a little die cut tab.

The heart was die cut from grungeboard and inked with Peacock Feathers and Victorian Velvet. It was coated with Rock Candy Distress glitter. When it was dry, I inked the edges with Gathered Twigs. I also die cut a little tag from a scrap piece of paper and placed a number cut from the background paper on top, together with a rub-on.

The flourishes were die cut from grungeboard and inked with Victorian Velvet and Peacock Feathers. Like the heart, they were also coated with Rock Candy glitter. The oval was leftover from another project and was painted with Victorian Velvet Distress Paint.

Thank you for stopping by! Have a wonderful Christmas!!

Anna-Karin

Supplies:
Surfaces: Tim Holtz Idea-ology: Collage Mini Paper Stash, Grungeboard; Ranger Specialty Stamping Paper
Stamps: Stampers Anonymous Tim Holtz: Christmas Blueprint 2
Dies: Sizzix: Tiny Tabs & Tags, Mini Hearts, Botanical Flourish
Ink: Distress Ink: Peacock Feathers, Victorian Velvet, Gathered Twigs; Ranger Archival Ink Jet Black
Paint: Distress Paint Victorian Velvet
Glitter: Distress Glitter: Rock Candy
Embellishments: Tim Holtz Idea-ology: Christmas Time Remnant Rubs, Game Spinners, Long Fastener

Tuesday, December 24, 2013

Santa's Village Tutorial

Christmas Eve and time for my last Sizzix tutorial of the year. It is a kiddies craft Santa village, but I am adding links to other tutorials of mine so that you can easily make a more elaborate and complex project out of this.  
 
This project started out with little wooden Santas that we made, and we felt that they needed a home. I used some of my favourite Sizzix dies to build a little scene: Eileen Hull's 3-D Birdhouse, Brenda Walton's 3-D Christmas Tree and Tim Holtz Reindeer Flight. In Sweden, the tradition regarding Santas is a bit different, with 'tomtenissar' ('little Santas) who were believed to help people out on the farms, if they were in the mood, because these little characters can be in a bad mood too, if they are not kept happy, for instance by giving the rice porridge on Christmas Eve. You can read more about it here. The little Santas were made with supplies from Panduro Hobby, but you can populate the village with other characters too. Children will need more or less help with the project, depending on their age.
 
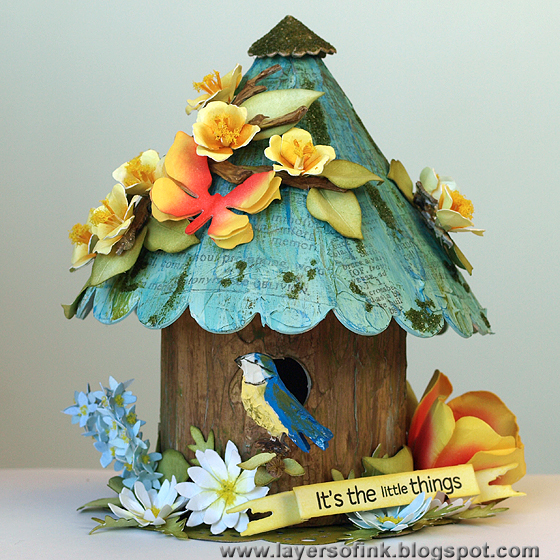
Children love to make little houses and Eileen Hull's 3-D Birdhouse works great, since it is so easy to assemble and decorate. For a different version, you can also use Brenda Walton's Country Cottage, check out this tutorial of mine. Die cut two houses from mat board - don't let children operate the Big Shot, since their fingers might get caught. I cut the doors larger with a craft knife, so that the Santas can go inside. We ended up not using the floor pieces.

Emboss the roofs in two different embossing folders.

My son picked the colours for the project himself and painted the houses. He is not yet four years old, so the painting is naturally a bit rough. :) You could also ink and stamp the houses instead. I posted two different versions of this birdhouse, a Heart Birdhouse and a Picket Fence Birdhouse, for more inspiration.

Paint both houses and the roofs. For other ideas on decorating the parts of a house check out these tutorials: Where the Heart Is, Yellow Brick House, Winter Wonderland House, Winter Cottage, and the two birdhouses linked above.

Assemble the houses. It is very easy since the die both cuts and scores the material and a bigger child will be able to assemble the houses on her or his own. I used staples at the side pieces and Wonder Tape for the roof.

 Die cut eight or more deer from mat board or chipboard.

 Glue them together to form a dimensional deer.

Paint the deer. For a more elaborate version of this deer, check out my Snowy Woods project.

Our village needed some trees, and I used Brenda Walton's fun Christmas Tree die for this. It is a Bigz die and cuts trees in three different sizes, which is quite impressive for such a small die. I used the two larger versions here. The smaller version was used on my Winter Cottage project, which is also an example of how you could alter these trees to fit a more complex project. I die cut eight of the smaller trees and ten of the larger trees.

Glue the trees together to form a dimensional tree. A bigger child will be able to do this on his or her own, I had to help.

One of Anton's favourite parts of the project was adding the Snow-Tex snow. He was very fascinated with the idea of fake snow. I helped with this step too. Leave to dry. You can also use Wendy Vecchi's White Embossing Paste and sprinkle it with Rock Candy Glitter, as I did on the Winter Cottage.
 
Embellish the houses with rhinestones, tinsel, word stickers or anything else you can think of.
 
 More rhinestones.
 
For a base, I covered a thick piece of chipboard with gesso, or use white paint. You could use a wooden board too. Tear cotton wool in small balls. Smear glue on one section at a time and let the child add the snow. This was a really fun step!

The trees and houses are stuck down, but the figurines can be moved around.  
 
I had planned to place the deer among the trees, but for Anton it was self-evident that it was going to pull the sleigh.
 
You could also make little gifts and place on a sleigh.
 
 The Santas can go inside the houses, if they get cold among all that snow.
 
 These two are standing on wooden skis.
 
The skis are pulled by these two little Santas.
 
 The dimensional trees add so much to the scene and are very easy to make.

Since the roof is embossed the paint didn't get everywhere, adding to the snowy look.

From above.

I hope you get time for some crafting during Christmas.

Have a very Merry Christmas!!! Enjoy every moment!

Anna-Karin

Supplies:
Surfaces: Sizzix Little Sizzles White Mat Board 6 x 13; Bazzill green cardstock
Dies: Sizzix: 3-D Birdhouse3-D Christmas Trees, Reindeer Flight
Embossing folders: Sizzix: Dot-Matrix & Gridlock, Textured Poinsettia Pattern
Paint: red, gold, black and cream craft paint
Snow: DecoArt: Snow-Tex
Figurines: Panduro Hobby: Winter Game kit, wooden sleigh; googly eyes
Embellishments: Tim Holtz Idea-olgy Seasonal ChitChat stickers; rhinestones